Cheap Portable Grill Table
So I live in a very small apartment. We have a deck and are allowed to have grills, but the size of the deck really prohibits a full size grill. I recently then bought the small and portable Weber Q1200 grill and I love it. It is robust, reliable and cooks very well. While I sometimes wish I had multiple burners (one of the only cons of the grill I've noticed so far), it works very well for me and my SO. The one problem was that I either had to grill on the ground (it hurts the back a bit) or buy the $80 grill cart for the Q1200. Instead, I decided to build a low cost solid wood grill table for about $50. It has been amazing to have and allowed me to add some personal touches (like the optional bottle opener). Here we have the instructions and some design files for this grill table. Feel free to download any files and try building it yourself! As always I would also love to hear any critisisms (ideally constructive), questions, or other ideas/modifications you may have made on your own.
Tools
- Drill
- Driver
- Circular Saw
- Tape Measure
Materials
| Material | Qty. | Unit Cost |
|---|---|---|
| Generic Lumber (2in x 6in x 8ft) | 2 | $6.93 |
| Generic Lumber (2in x 3in x 8ft) | 2 | $2.85 |
| Generic Lumber (4in x 4in x 8ft) | 2 | $12.85 |
| Deck Screws (1.5in) | 50 | $0.05 |
| Total = | $47.76 |
Interactive CAD Model
Instructions
-
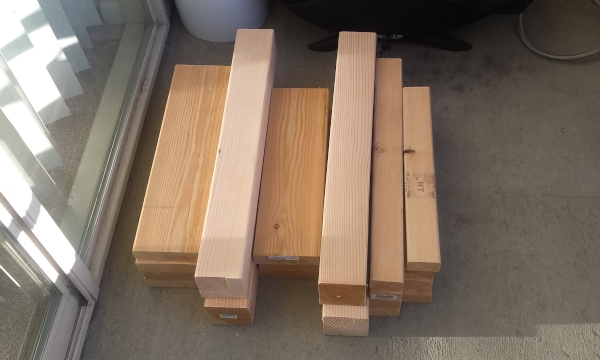
Cut the lumber to size

We will begin by cutting all of the required size lumber needed for the table. While I used a circular saw for this step, I must say that I really wished I'd had a miter saw. This is especially useful for the 4x4 lumber because my circular saw can't cut deep enough to make it through in a single cut.
-
Cut 5 x 20” pieces from the 2”x6” lumber (or 18” length if you don't want the top surface to overhang)
-
Cut 3 x 18” pieces from the 2”x6” lumber
-
Cut 4 x 18” pieces from the 2”x3” lumber (an 8’ board will produce 4 x 18” pieces plus a single board just about 23.5” after accounting for the kerf)
-
Cut 4 x 23.5” pieces from the 2”x3” lumber
-
Cut 4 x 26.5” pieces from the 4”x4” lumber
-
-
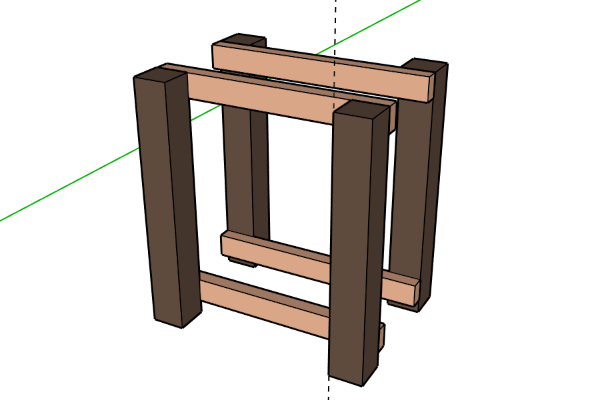
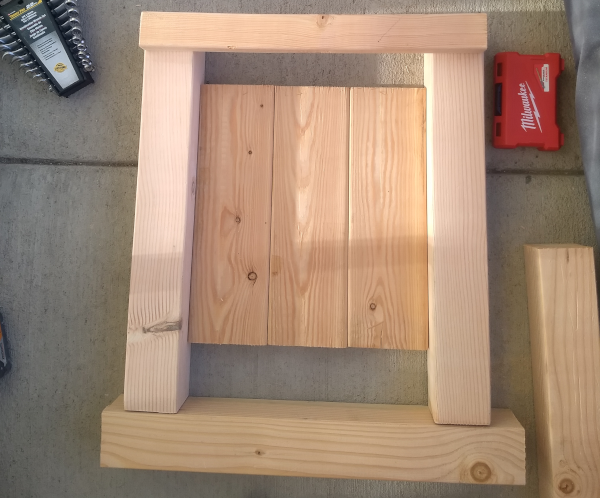
Build the Frame Sides

We can now construct two of the sides that will eventually make up the frame of the table. It may be useful in this step to use 3 of the 2x6 boards as spacers for the legs.
-
Connect 2 x (2”x3”x23.5” pieces) beams between the 2 x (4”x4”x26.5” pieces) legs flush with (or slightly above) the top and outer edges of the 4”x4” beams.
-
Add 2 x (2”x3”x23.5”) to each of the sides at a height of 1.5” inches from the bottom of the 4”x4” legs.
-
Fasten together using 2 x 1.5 inch wood screws at each connection
-
-
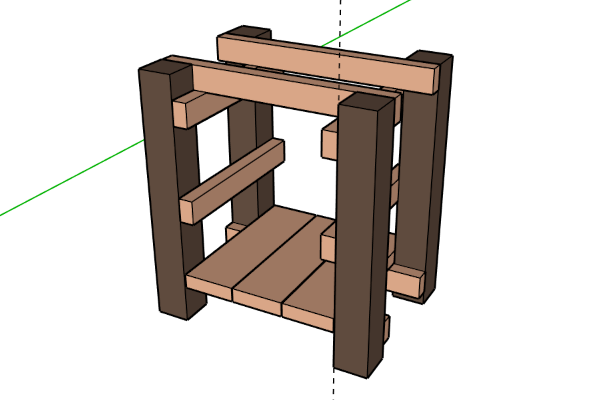
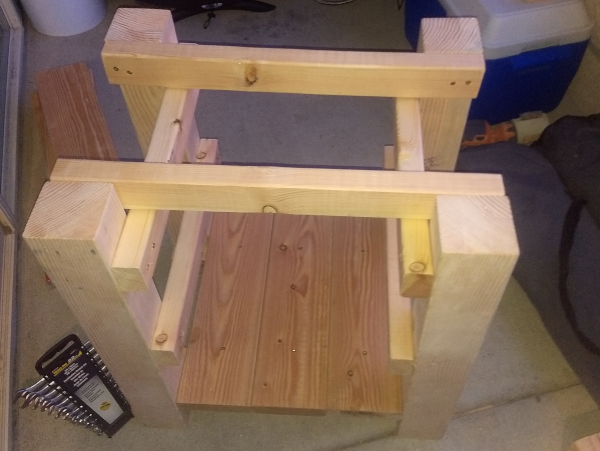
Connect the Frame Sides

Taking the sides that we created in the previous step, we can now connect them to create the frame of the table.
-
Connect each of the frame sides at an 18” distance with the 2 x (2”x3”x18”) pieces at a height of 12” from the bottom of the legs.
-
Add another 2 x (2”x3”x18”) pieces just below the top (2”x3”x23.5”) pieces added in the previous step. This support will just butt up against the top cross-beam.
-
Fasten together using 2 x 1.5 inch wood screws at each connection
-
-
Create the Propane Shelf

With the frame completed, we can now add 2x6 boards to create a lower shelf to hold a typical 15 lb propane tank
-
Add 3 x (2”x3”x18”) across the 24” span at the bottom of the frame to create a flat surface between the legs.
-
Drive 1.5 inch deck screws through the top of the 2x6 boards into the frame cross-beam at both the front and the back of each of the 2x6 boards to secure the shelf in place
-
-
Create the Table Top

With the frame together, we can now create our top surface for the grill bottom shelf which will hold the propane bottle. Again some self tapping deck screws and a driver make quick work of this job.
-
Add 5 x (2”x6”x18”) across the top of the frame. It is recommended these are only screwed into the (2”x3”x23.5”) cross-beams and NOT the 4”x4” legs. This provides for easier dissasembly for moving
-
Drive 1.5 inch deck screws through the top of the 2x6 boards into the top cross-beam at both the front and the back of each of the 2x6 boards to secure the table top in place
-
-
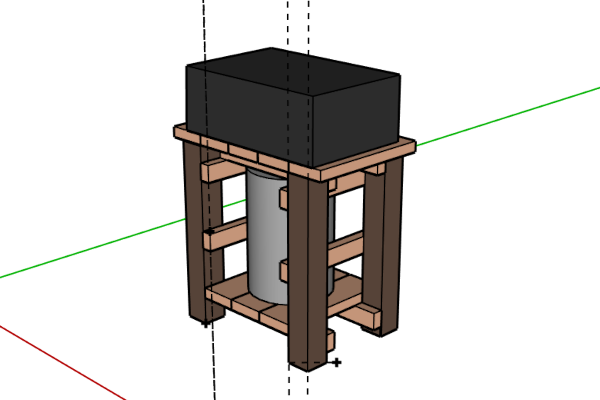
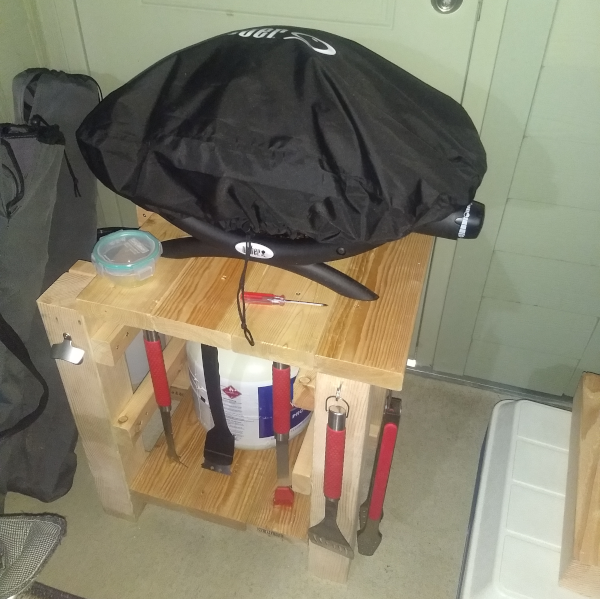
Add the Grill, Propane, and any Extras

This may just be the hardest step of the whole project... (This is sarcasm if that didn't make it across) You now have to place your grill on your beautiful new table! A standard propane tank should fit nicely on the bottom shelf of the table. While it is definitely optional, during this step I also added a bottle opener and some hook screws to mine to allow me to hang my grilling utensils and have a nice cold beer without having to go inside. These can be seen in the final product and should be placed wherever they fit best for your setup!


And That's It!
And you now have a great place to put a portable grill for small space living! Keep in mind that there are downloadable CAD (computer aided design) files for 3D viewing of this design near the top of this page. The *.stl files can be opened using the Windows 10 3D viewer and the *.skp files can be opened and edited using the sketchup cad software. Feel free to contact me with any necessary comments, questions, or clarifications!
Other Images
1 comments

This is the first comment for netlify! Lets see if it works